The Best Fluffy Pancakes recipe you will fall in love with. Full of tips and tricks to help you make the best pancakes.

Origin of the Bloomin’ Onion
Before we dive into the best ways to reheat a Bloomin’ Onion, let’s explore its origin. This mouthwatering appetizer is believed to have been popularized by the Australian-themed restaurant chain Outback Steakhouse.
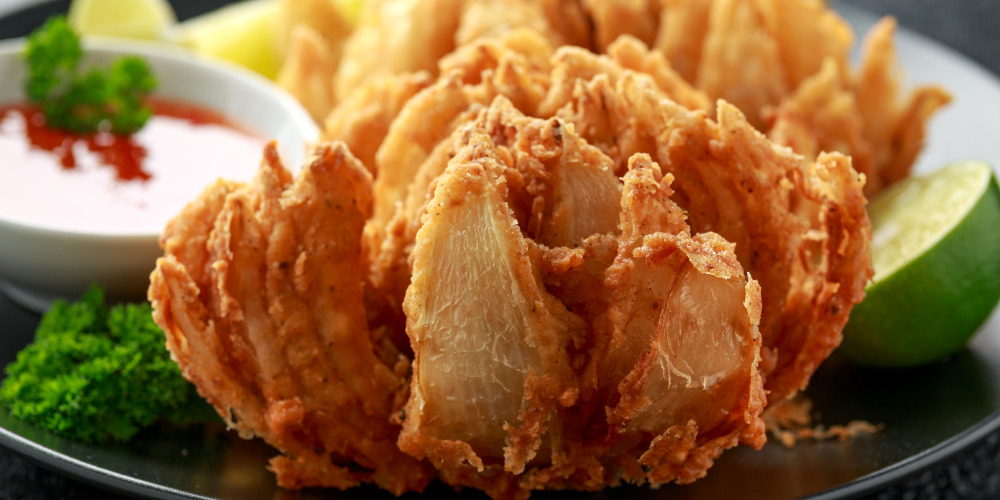
The Bloomin’ Onion, also known as an onion blossom, is a deep-fried onion dish that features a spiced crust, resembling a blooming flower. It’s a savory delight, and if you happen to have leftovers, reheating them to retain their crispy texture is essential.
The Best Way to Reheat a Bloomin’ Onion: Oven Method
The oven method is one of the best ways to reheat a Bloomin’ Onion and maintain its crispy texture.
Step 1: Preparation
Before you start reheating, gather the following items and ingredients:
- Leftover Bloomin’ Onion: If you have a whole leftover Bloomin’ Onion, that’s perfect. If it’s already sliced or partially eaten, it will still work.
- Baking Sheet: You’ll need a baking sheet lined with parchment paper or aluminum foil for easy cleanup.
- Wire Rack: A wire rack placed on top of the baking sheet helps elevate the Bloomin’ Onion for even heating.
- Oven: Preheat your oven to 350°F (175°C).
Step 2: Reheating
- Place on Wire Rack: Put your leftover Bloomin’ Onion on the wire rack, ensuring it’s evenly supported.
- Heat in the Oven: Place the wire rack with the Bloomin’ Onion in the preheated oven for 10-15 minutes. This will help re-crisp the exterior.
- Check for Crispiness: After 10-15 minutes, check the Bloomin’ Onion for crispiness. It should be golden brown and have regained some of its signature crunch.
- Serve Hot: Once it reaches the desired level of crispiness, remove it from the oven and serve hot with your favorite dipping sauce.
Tips and Tricks
- Wire Rack: Elevating the Bloomin’ Onion on a wire rack allows hot air to circulate around it, ensuring that it heats evenly and maintains its crispy texture.
- Parchment Paper or Aluminum Foil: Using parchment paper or aluminum foil on the baking sheet makes cleanup a breeze and prevents any excess oil from dripping onto the oven.
- Room Temperature: If your leftover Bloomin’ Onion is stored in the refrigerator, allow it to come to room temperature before reheating. This helps prevent it from becoming too dry during reheating.
The Air Fryer Method: A Quick and Effective Way
An air fryer is a fantastic appliance for reheating a Bloomin’ Onion, as it circulates hot air to achieve that crispy perfection.
Step 1: Preparation
Gather the following items and ingredients:
- Leftover Bloomin’ Onion: Whether it’s a whole or partially eaten Bloomin’ Onion, the air fryer can work its magic.
- Air Fryer Basket: Ensure your air fryer basket is clean and ready for use.
- Parchment Paper: To prevent sticking and make cleanup easier.
- Oven Mitts: Necessary for handling the hot air fryer basket.
Step 2: Reheating
- Preheat the Air Fryer: Set your air fryer to 350°F (175°C) and allow it to preheat for a few minutes.
- Place on Parchment Paper: Lay the leftover Bloomin’ Onion on a piece of parchment paper inside the air fryer basket. This prevents sticking and helps maintain its shape.
- Reheat: Cook the Bloomin’ Onion in the preheated air fryer for about 3-4 minutes. Keep an eye on it to avoid overcooking.
- Check for Crispiness: After 3-4 minutes, check the Bloomin’ Onion for crispiness. It should be golden brown and have regained some of its original glory.
- Serve Hot: Once it’s crispy and heated through, use oven mitts to carefully remove the Bloomin’ Onion from the air fryer basket and serve hot with your preferred dipping sauce.
Tips and Tricks
- Parchment Paper: Using parchment paper in the air fryer prevents the Bloomin’ Onion from sticking to the basket and makes cleanup easier.
- Preheating: Preheating the air fryer ensures that the Bloomin’ Onion starts cooking immediately and helps maintain its crispy texture.
The Microwave Method: An Easiest Way for Quick Reheating
If you’re in a hurry and looking for the quickest way to reheat a Bloomin’ Onion, the microwave can come to your rescue.
Step 1: Preparation
Gather the following items and ingredients:
- Leftover Bloomin’ Onion: Whether it’s a whole or partially eaten Bloomin’ Onion, the microwave can do the job.
- Microwave-Safe Dish: Choose a microwave-safe dish that is large enough to accommodate the Bloomin’ Onion without overcrowding.
- Microwave-Safe Plate or Microwave-Safe Bowl: For covering the dish to trap steam.
- Damp Paper Towel: To maintain moisture and prevent the Bloomin’ Onion from drying out.
- Plastic Wrap or Microwave-Safe Cling Wrap: To cover the dish tightly.
- Oven Mitts: Necessary for handling the hot dish.
Step 2: Reheating
- Place in Microwave-Safe Dish: Lay the leftover Bloomin’ Onion in a single layer inside the microwave-safe dish.
- Add Moisture: Place a damp paper towel on top of the Bloomin’ Onion to help maintain moisture.
- Cover Tightly: Use plastic wrap or microwave-safe cling wrap to cover the dish tightly. This creates a steamy environment that helps prevent dryness.
- Microwave on Low: Heat the Bloomin’ Onion in the microwave at a lower power level, typically around 50% power. Start with 1-2 minutes at a time.
- Check and Stir: After each interval, carefully check the Bloomin’ Onion’s temperature and stir it to ensure even heating.
- Serve Hot: Once it’s heated through and reached the desired temperature, use oven mitts to remove the dish from the microwave and serve hot with your preferred dipping sauce.
Tips and Tricks
- Low Power Level: Microwaving at a lower power level helps prevent the Bloomin’ Onion from becoming too dry or losing its crispy texture.
- Damp Paper Towel: Placing a damp paper towel on top of the Bloomin’ Onion prevents it from drying out during microwaving.
- Stirring: Stirring the Bloomin’ Onion between intervals ensures even reheating.
Reheating a Bloomin’ Onion in a Frying Pan: A Crispy Delight
Reheating a Bloomin’ Onion in a frying pan is another excellent way to revive its crispy texture and savor its flavorful goodness. This method offers the advantage of direct heat, allowing you to achieve that signature crunch while preserving the savory onion meat inside. Let’s explore the step-by-step guide on how to do it, incorporating the remaining keywords for a comprehensive approach.
Step 1: Preparation
Before you start, ensure you have the following items and ingredients ready:
- Leftover Bloomin’ Onion: Whether it’s a whole or partially eaten Bloomin’ Onion, this method can work wonders.
- Frying Pan: Use a non-stick frying pan for even heating and to prevent sticking.
- Vegetable Oil: A little vegetable oil is needed for frying.
- Medium Heat: Set your frying pan to medium heat for precise control.
- Paper Towel: Have some paper towels handy to blot excess oil.
- Wire Rack: If available, place a wire rack over a baking sheet for draining excess oil.
Step 2: Reheating
- Preheat the Frying Pan: Place the frying pan on the stove and set it to medium heat. Allow it to preheat for a minute or two.
- Add Vegetable Oil: Add a little vegetable oil to the preheated frying pan. Swirl it around to coat the bottom evenly. The oil should be hot but not smoking.
- Place the Bloomin’ Onion: Gently lay the leftover Bloomin’ Onion in the hot oil, ensuring it sits flat in the pan. Allow it to fry.
- Fry to Crispy Perfection: Fry the Bloomin’ Onion for approximately 3-4 minutes on each side or until it reaches a golden brown, crispy texture. Use a spatula to carefully flip it.
- Blot Excess Oil: Once it’s crispy and heated through, transfer the Bloomin’ Onion to a wire rack placed over a baking sheet or onto a plate lined with paper towels. Blot any excess oil with another paper towel.
- Check for Crispiness: Confirm that the Bloomin’ Onion has regained some of its original glory and reached the desired level of crispiness.
- Serve Hot: Carefully transfer the revived Bloomin’ Onion to a serving platter and serve it piping hot with your preferred dipping sauce.
Tips and Tricks
- Medium Heat: Maintaining medium heat ensures that the Bloomin’ Onion crisps up without burning.
- Excess Oil: Blotting excess oil after frying helps keep the Bloomin’ Onion from becoming overly greasy.
- Spatula: Use a spatula to flip the Bloomin’ Onion gently to avoid damaging its delicate petals.
- Dipping Sauce: Don’t forget to pair your perfectly reheated Bloomin’ Onion with a delicious dipping sauce to enhance the overall flavor.
Reheating a Bloomin’ Onion in a frying pan provides a quick and effective way to enjoy its original crispy texture and savory onion meat. With a little bit of patience and the right technique, you can savor the delightful taste of this appetizer whether it’s a leftover Bloomin’ Onion from your favorite restaurant or one you prepared at home.
Dipping Sauces: Elevating the Bloomin’ Onion Experience
One of the joys of enjoying a Bloomin’ Onion is dipping its crispy petals into a delicious sauce. Here are some classic and creative dipping sauce options to enhance your Bloomin’ Onion experience:
- Ranch Dressing: This classic choice complements the crispy onion with a creamy and tangy flavor.
- Sour Cream: For a milder, cooling dip, sour cream is an excellent choice.
- Garlic Aioli: Elevate your Bloomin’ Onion with a garlicky mayo-based dip.
- Ketchup: The simple and familiar ketchup pairs well with the crunchy goodness of the Bloomin’ Onion.
- Spicy Mayo: Combine mayonnaise with a dash of hot sauce or Sriracha for a spicy kick.
- Bacon Bits: Crumbled bacon bits mixed with mayonnaise or sour cream add a smoky and savory dimension to your dip.
- Signature Bloomin’ Onion Sauce: If you’re feeling adventurous, recreate the signature sauce from Outback Steakhouse by mixing mayonnaise, ketchup, horseradish, and a dash of paprika.
Storage Options for Leftover Bloomin’ Onion
In case you can’t finish your Bloomin’ Onion in one go, here are some storage options:
- Airtight Container: Place the leftover Bloomin’ Onion in an airtight container and store it in the refrigerator for up to 3-4 days. Keep in mind that it may lose some of its crispiness during storage.
- Glass Container: If you prefer glass containers, they work well for storing a Bloomin’ Onion too. Just ensure it’s airtight.
- Plastic Wrap: Wrapping the leftover Bloomin’ Onion tightly in plastic wrap can help prevent moisture loss and maintain its texture.
- Piece of Cardboard: To keep the petals from collapsing onto each other, place a piece of cardboard or a small, sturdy object in the center of the Bloomin’ Onion before storing.
Final Thoughts on Reheating a Bloomin’ Onion
Whether you’re enjoying a Bloomin’ Onion as a side dish, appetizer, or even a tasty snack, reheating it to maintain its crispy texture and original flavor is key. The oven, air fryer, and microwave methods each offer effective ways to bring that deep-fried goodness back to life. Remember to choose the method that suits your needs and enjoy your Bloomin’ Onion with your favorite dipping sauce for a delightful culinary experience.


